 Save
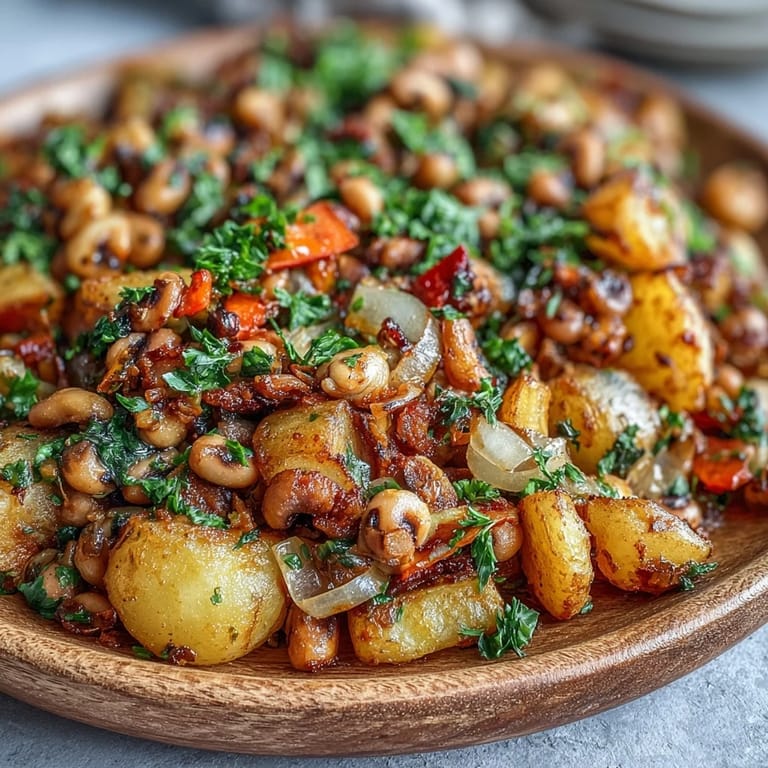
Save There's something about the smell of roasted potatoes hitting your kitchen that makes everything feel right, and that's exactly what happens when you throw this black-eyed pea hash together on a lazy weekend morning. My neighbor stopped by one Saturday while I was pulling this out of the oven, and the aroma practically dragged her inside—she ended up staying for breakfast and has been making it ever since. It's the kind of dish that tastes way more impressive than the effort it takes, with crispy golden potatoes, tender peppers, and those earthy black-eyed peas all caramelized at the edges. The beauty is you can eat it solo with coffee, or pile eggs on top and call it a proper meal.
I made this for my dad during a visit home, and he actually put his phone down—which never happens—because he was too busy asking for seconds and wondering why he'd never thought to roast black-eyed peas before. We sat at the kitchen counter eating straight from the baking sheet with forks, talking about nothing important, and it became one of those small moments that sticks with you. It wasn't fancy or complicated, just honest food that tasted like care.
Ingredients
- Black-eyed peas: Use canned and drained for speed, or cook dried ones ahead of time—either way, they hold their shape beautifully during roasting and absorb all those wonderful spice flavors.
- Yukon Gold potatoes: They're waxy enough to not fall apart but still get creamy inside with crispy edges, though russets work if that's what you have.
- Bell peppers (red and green): The mix of colors looks stunning and they caramelize into something almost candy-like without any added sugar.
- Yellow onion: Roasting mellows out its bite and turns it sweet, which balances the earthiness of everything else.
- Garlic: Just two cloves scattered throughout means you get pockets of flavor without it overpowering the dish.
- Smoked paprika: This is your secret weapon—it gives depth and a subtle smokiness that makes people ask what your secret ingredient is.
- Cumin and thyme: Together they create a warm, almost savory-sweet backbone that ties all the vegetables together.
- Olive oil: Two tablespoons total is lean enough to keep it light but enough to get everything properly roasted and caramelized.
Tired of Takeout? 🥡
Get 10 meals you can make faster than delivery arrives. Seriously.
One email. No spam. Unsubscribe anytime.
Instructions
- Get your oven ready and start the potatoes:
- Crank the oven to 425°F and toss your diced potatoes with a tablespoon of olive oil and half the salt and pepper, then spread them out on a baking sheet in a single layer where they'll have room to breathe and brown. This head start is crucial because potatoes need more time than the peppers and onions to get properly tender.
- Mix your seasonings and vegetables:
- While the potatoes are working, combine your black-eyed peas, diced onion and peppers, minced garlic, and the remaining olive oil in a bowl, then add in your smoked paprika, cumin, thyme, and the rest of the salt and pepper. Taste a bite of raw onion to make sure you're happy with the seasoning—you want it to taste good even before it roasts.
- Combine everything and finish roasting:
- After those first 15 minutes, pull the potatoes out and dump everything else onto the sheet with them, tossing it all together so the oil and spices coat every piece. Return it to the oven for another 15 minutes, stirring once halfway through so nothing sticks to the pan, until the potatoes are golden and the peppers are soft with some charred edges.
- Finish and serve:
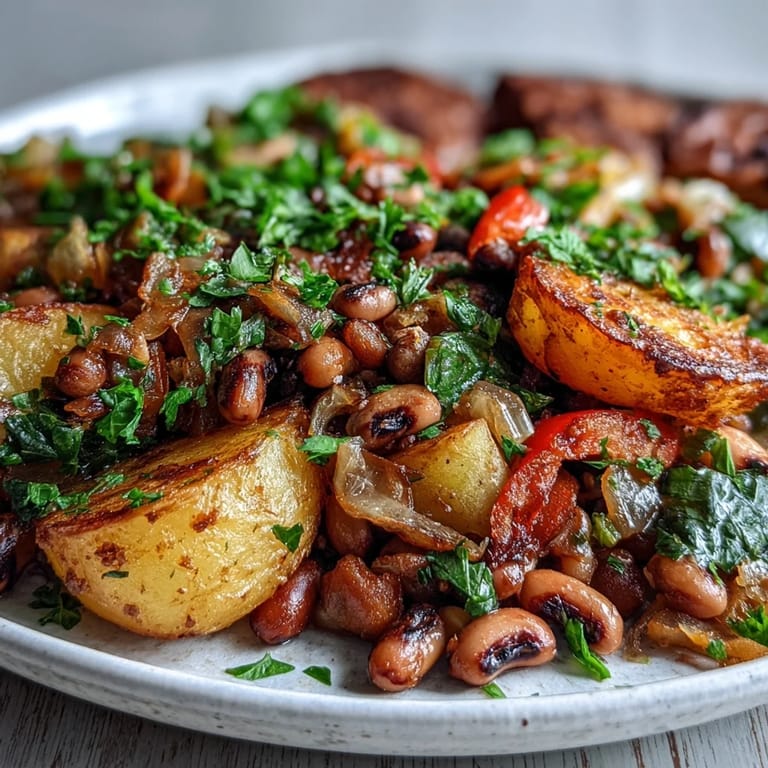
- Pull it out of the oven and scatter fresh parsley or green onions over top if you have them, then serve it hot straight from the sheet or pile it into bowls. It's best eaten fresh while everything still has that crispy texture, though it keeps fine in the fridge for a few days.
 Save
Save This dish reminds me that sometimes the simplest preparations let good ingredients shine, and there's something deeply satisfying about roasting things together in one pan and watching them transform. It's become my go-to when I want something that feels nourishing without being complicated, and it's converted at least three people who thought they didn't like black-eyed peas.
Why Roasting Makes the Difference
Pan-frying or boiling these ingredients would be fine, but something magical happens in the oven when the heat comes from all sides and everything caramelizes slowly instead of just softening. The natural sugars in the onions and peppers concentrate and concentrate, and the black-eyed peas get these little crispy bits on the outside while staying tender inside. I learned this by accident one day when I went to sauté this on the stovetop and decided halfway through I was too lazy to stand there, so I just threw it in the oven instead—best kitchen laziness decision I've made.
Serving Ideas That Actually Work
On its own it's substantial enough for lunch with a green salad and crusty bread, but the magic really happens when you top it with a fried egg or two for breakfast, or pile it next to some grilled chicken or fish for dinner. I've also mixed it with avocado when I want something cooler, and I've seen people add it to grain bowls where it brings serious flavor and texture. The versatility is part of why I keep making it—it adapts to whatever meal and whatever mood you're in.
Storage and Reheating Tips
This keeps in the fridge for about four days in a covered container, and while it's best fresh and hot, it's genuinely good cold or reheated gently in a skillet with a tiny splash of water to refresh it. I've eaten leftover portions straight from the fridge as a snack and never regretted it, and the flavors actually deepen after a day of sitting together. Here's what helps keep it good:
- Let it cool completely before covering it so moisture doesn't make the crispy parts soggy.
- Reheat in a skillet over medium heat rather than the microwave to restore some of the texture.
- If you're making it ahead, roast the potatoes separately and add everything else fresh for the best crispness.
 Save
Save This is one of those recipes that proves how good food doesn't require a shopping list of fancy ingredients or hours at the stove. Once you make it once, you'll find yourself making it whenever you want something that feels both nourishing and indulgent, and that's the highest compliment a recipe can get.
Recipe FAQs
- → Can I use dried black-eyed peas instead of canned?
Yes, soak and cook dried black-eyed peas according to package directions before using. You'll need about 1 cup dried peas to yield 2 cups cooked. Make sure to drain them well so they roast properly.
- → What vegetables work well in this hash?
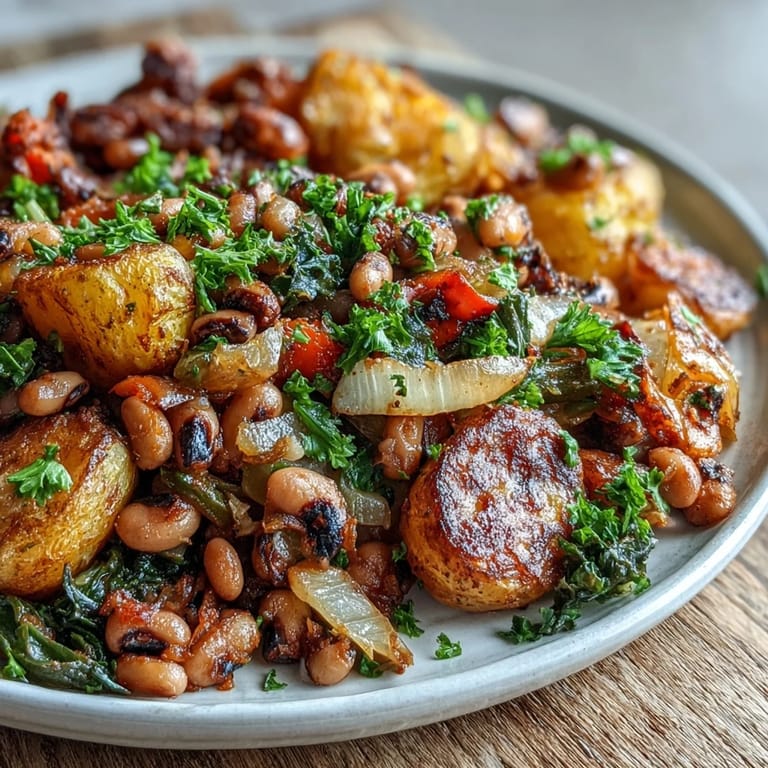
Beyond the classic potatoes and bell peppers, you can add diced sweet potatoes, zucchini, corn, or diced tomatoes. For heartier greens like kale or collards, chop them finely and add during the last 10 minutes of roasting.
- → How do I store and reheat leftovers?
Store cooled hash in an airtight container in the refrigerator for up to 4 days. Reheat in a skillet over medium heat until crispy and warmed through, or microwave in 30-second intervals. The flavors actually improve after sitting overnight.
- → Can I make this on the stovetop instead?
Absolutely. Heat oil in a large skillet over medium-high heat. Add potatoes first and cook 10 minutes until nearly tender, then add onions and peppers for 5 minutes. Finally, add black-eyed peas and seasonings, cooking 5 more minutes until everything is golden and crispy.
- → What dishes pair well with this hash?
Serve alongside fried or poached eggs for a classic breakfast. It also complements cornbread, buttermilk biscuits, or grits. For a lighter meal, pair with a simple green salad dressed with vinaigrette. Top with avocado slices or hot sauce for extra flavor.
- → Is this dish freezer-friendly?
Yes, freeze cooled portions in freezer-safe containers for up to 3 months. Thaw overnight in the refrigerator, then reheat in a skillet or oven at 350°F until hot and crispy. The texture may be slightly softer than fresh.