 Save
Save The smell of vanilla and melted butter always reminds me how a simple cake can become the centerpiece of a milestone. One afternoon, as sunlight fell across my kitchen counter, I found myself swirling together shades of blue, uncertain if they would blend as elegantly as I hoped. Even the hum of my mixer felt celebratory, echoing the anticipation of forthcoming applause. Decorating this graduation cake felt less like work and more like painting a promise of new beginnings. I realized that sometimes, it's the smallest splatters of gold that transform a cake from ordinary to unforgettable.
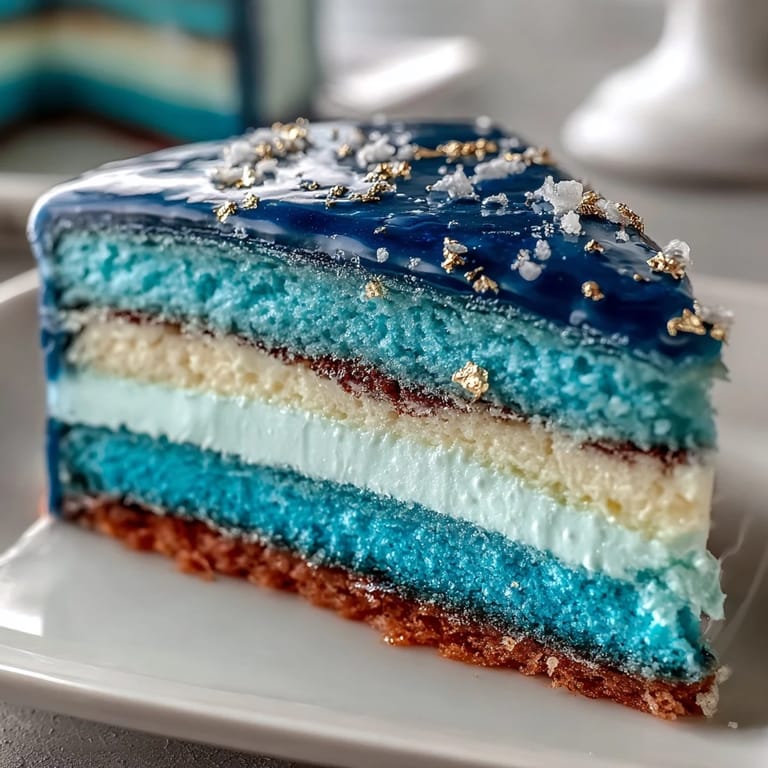
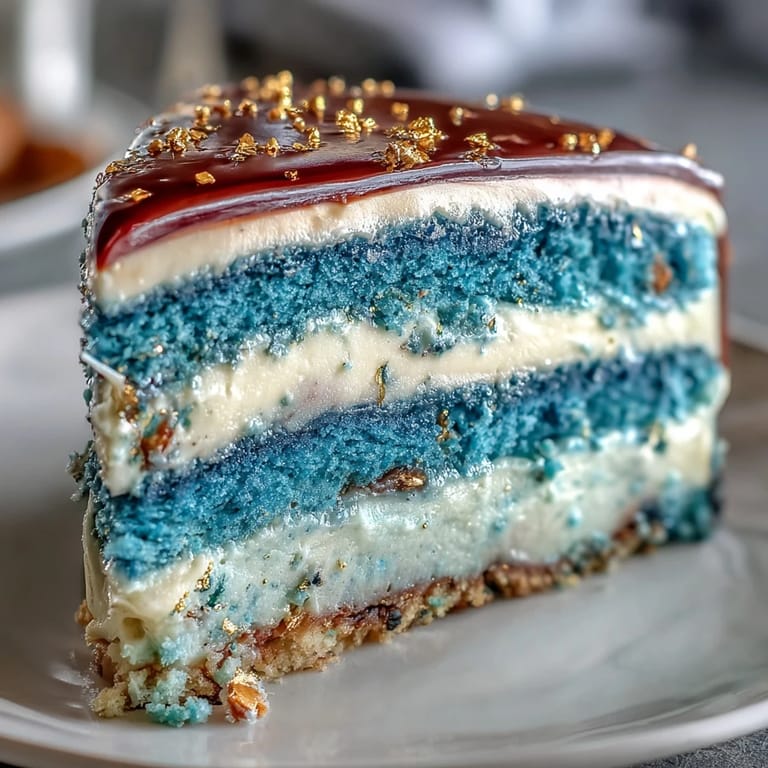
Last spring, I made this cake for my cousin's graduation in the midst of balloons and laughter. We juggled cake pans between stories of school misadventures, and I remember hesitating over just how much food coloring to use for the darkest layer. It turns out, the deeper the blue, the more dramatic the moment when the cake was revealed. The gold leaf scattered on top caught the sunlight, turning a simple dessert into a celebration. Years later, I still hear about that cake whenever someone crosses another milestone.
Ingredients
- All-purpose flour: Gives the cake its tender structure—sifting helps prevent lumps and ensures a smooth texture.
- Baking powder and baking soda: These rise agents keep the cake layers fluffy; make sure they are fresh for best results.
- Salt: Just a pinch intensifies the sweetness and vanilla notes.
- Unsalted butter: Room temperature butter creates a soft crumb and rich taste—leave it out before baking so it blends evenly.
- Granulated sugar: Sweetens and helps the layers caramelize—beat it well with butter until pale and airy.
- Large eggs: These bind the batter; let them come to room temperature for even mixing.
- Pure vanilla extract: Adds scent and flavor, so quality makes a difference.
- Whole milk: Room temperature milk keeps the batter smooth and moist.
- Blue gel food coloring: Gel colors create bold, true shades without thinning the batter; mix carefully for a seamless ombre.
- Powdered sugar: Sifting saves you from gritty buttercream.
- Dark blue gel food coloring: Blends beautifully for a dramatic finish—use sparingly to avoid staining your hands.
- Edible gold leaf or gold dust: Apply gently with a brush or tweezers; be sure it's labeled edible for safety.
- Clear alcohol: Vodka or lemon extract helps gold dust adhere without affecting flavor.
Tired of Takeout? 🥡
Get 10 meals you can make faster than delivery arrives. Seriously.
One email. No spam. Unsubscribe anytime.
Instructions
- Get Your Pans Ready:
- Preheat your oven to 350°F (175°C). Line three 8-inch round cake pans with parchment and a swipe of butter—the trick is pressing the parchment flat so there are no wrinkles.
- Dry Ingredients:
- In a medium bowl, whisk together flour, baking powder, baking soda, and salt until the mix feels light and uniform between your fingers.
- Butter & Sugar:
- Beat room temperature butter and sugar until visibly airy and almost pale—listen for the soft slap of beaters as the mixture thickens.
- Add Eggs & Vanilla:
- Crack eggs in one at a time, mixing after each, then pour in the vanilla; the batter should look silky and smell sweet.
- Mix and Alternate:
- Add flour, milk, flour, milk, flour—keeping your mixing slow so the ingredients just come together and the batter stays fluffy.
- Color the Layers:
- Divide batter evenly across three bowls. Gently stir in blue gel color, starting light and deepening as you go, like mixing paint for a canvas.
- Bake:
- Pour each colored batter into its pan, smoothing tops with an offset spatula. Bake 25–30 minutes, checking for a clean toothpick; let cakes cool before moving them.
- Buttercream Magic:
- Whip butter until creamy, then add powdered sugar in batches. Blend in vanilla, pinch of salt, plus enough milk for a texture that's soft but holds its shape.
- Tint & Spread:
- Set aside 1 cup for the initial crumb coat. Tint remaining buttercream with dark blue gel and mix until even throughout.
- Cake Assembly:
- Level cakes if needed. Stack layers from darkest to lightest, spreading buttercream between each layer and gently nudging them into place.
- Crumb Coat & Chill:
- Cover cake with a thin coat of reserved buttercream to seal in crumbs; chill for 20 minutes to set.
- Final Frost & Ombre:
- Frost cake smoothly with deep blue buttercream. Blend lighter blue upwards using a clean spatula for an ombre fade; keep sides sharp for drama.
- Gold Accents:
- Apply edible gold leaf or brush gold dust mixed with clear alcohol along the edges or top. Don't rush this step—it catches the light best when patience wins.
- Chill and Serve:
- Chill the finished cake until the buttercream is firm. Slice and serve whenever the celebration demands.
 Save
Save I remember the moment the first slice revealed the ombre blues. Suddenly, the room hushed, and all eyes landed on the cake—even the shyest guest grinned. Someone joked that the gold streaks looked like confetti raining down. It was only a dessert, but it carried the energy of accomplishment and togetherness. No matter how many cakes I bake, none share that exact feeling.
How to Achieve the Ombre Effect
Mastering ombre is simpler than it seems: use gel color and add a little at a time, mixing thoroughly between each addition. Starting with the lightest bowl lets you control the gradient with less risk of over-coloring. I discovered layering colors is best when you mix separate portions rather than trying to fix one big batch. Let each layer cool fully before stacking so the shades don't bleed or smudge together. If you’re nervous, test your colors on a spoon beforehand.
Troubleshooting Your Buttercream
Buttercream can be finicky—if it’s too stiff, add milk or cream slowly, just a spoonful at a time. Sometimes, if the butter is too cold, the texture turns lumpy instead of smooth, so patience is key. Sifting powdered sugar prevents any surprise crunch, and beating it well keeps everything airy. If coloring, add gel in small amounts to avoid overpowering the flavor. Always chill the bowl briefly if your kitchen gets warm.
Finishing Touches for the Big Day
Decorating is half the fun and totally personal. Graduation-themed toppers, chocolate stars, or even fresh berries can add festive flair—just make sure all decorations are edible. I like to apply gold leaf gently with clean tweezers for precision. Pairing with sparkling apple cider makes for a perfect toast.
- If layering gold dust, use a soft brush and gentle strokes.
- Check the packaging of decorations for allergen warnings—better safe than sorry.
- Keep a damp cloth handy for quick cleanup during decorating.
 Save
Save Whether for graduation or any celebration, this cake always brings smiles. It’s a joy to cut into and even better to share.
Recipe FAQs
- → How do I achieve the ombre effect on cake layers?
Divide the batter into three bowls and tint each with increasing amounts of blue gel coloring to create a gradient from light to dark blue.
- → What is the best method for smooth buttercream frosting?
Beat butter until creamy, gradually add powdered sugar, and adjust with milk or cream for a spreadable consistency. Use an offset spatula for even layering.
- → Are edible gold decorations safe to use?
Ensure that gold leaf or gold dust is labeled edible and safe for cake decorating. Always check packaging for allergen information.
- → Can I add extra layers for a more dramatic effect?
Yes, use four or five cake layers with varying blue shades to intensify the ombre appearance and visual impact.
- → What tools help with assembly and decoration?
Round cake pans, an electric mixer, offset spatula, parchment paper, and a cake turntable support smooth assembly and creative decorating.
- → Is the cake suitable for vegetarians?
Yes, the ingredients provided are vegetarian-friendly; however, check for any dairy or egg restrictions as needed.
- → How should I store leftover cake?
Keep any uneaten cake chilled, covered tightly, to maintain freshness and prevent the buttercream from melting.