 Save
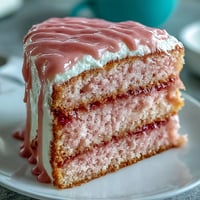
Save My sister called me three weeks before Mother's Day in a slight panic—she'd volunteered to bring dessert to our family gathering and suddenly realized she'd promised something showstopping. I found myself at her kitchen table with my laptop, sketching out a cake that felt both elegant and achievable, and that's when this pink ombre creation came to life. The idea was simple: tender vanilla layers, buttercream that graduated from white to blush to rose, and fresh flowers scattered across the top like something from a garden party. She made it that weekend, and watching her carefully pipe and blend those pinks was oddly meditative—less about perfection and more about creating something beautiful for someone she loved.
I'll never forget watching my mom's face light up when she saw this cake at the table—not because it was perfect, but because my sister had made it with her own hands. There was a small wobble on one side where the layers shifted slightly, but it didn't matter. What mattered was the taste, the care, and the fact that something so visually stunning had come from a regular home kitchen and not a bakery.
Ingredients
- All-purpose flour (2 ½ cups): This is your foundation—it needs to be measured correctly, so spoon it gently into your measuring cup and level it off rather than scooping directly from the bag.
- Baking powder (2 ½ tsp): Don't skip the baking powder, and definitely don't substitute it with baking soda unless you love a dense, heavy cake.
- Salt (½ tsp): Just a pinch, but it makes the vanilla shine and balances the sweetness.
- Unsalted butter (1 cup plus 1 ½ cups): Room temperature is non-negotiable here—cold butter won't cream properly, and you'll end up with a dense cake.
- Granulated sugar (2 cups): This creams with the butter to create tiny air pockets that make the cake light and fluffy.
- Eggs (4 large): Room temperature eggs blend smoothly into the butter mixture without curdling or creating lumps.
- Pure vanilla extract (1 tbsp plus 2 tsp): Use real vanilla, not imitation—you'll taste the difference in every bite.
- Whole milk (1 cup): Room temperature milk prevents the batter from seizing up when mixed into the butter and sugar.
- Powdered sugar (5 cups): Sift it before using, or you'll have little lumps hiding in your buttercream no matter how much you beat it.
- Milk or heavy cream (2-3 tbsp): A splash of this loosens the buttercream to the perfect spreading consistency—too thick and it tears the cake, too thin and it's floppy.
- Pink gel food coloring: Gel holds its intensity without watering down your buttercream the way liquid coloring does.
- Edible flowers: Violets, pansies, and rose petals add that garden-party elegance—just make sure they haven't been sprayed with pesticides.
Tired of Takeout? 🥡
Get 10 meals you can make faster than delivery arrives. Seriously.
One email. No spam. Unsubscribe anytime.
Instructions
- Set your stage:
- Preheat your oven to 350°F and grease those three 8-inch pans with butter or cooking spray, then line the bottoms with parchment paper. This one extra step is the difference between a cake that turns out cleanly and one that sticks stubbornly to the pan.
- Prepare the dry ingredients:
- Whisk flour, baking powder, and salt together in a bowl—this distributes the baking powder evenly so you don't get random dense pockets in your cake.
- Cream the butter and sugar:
- Beat room-temperature butter and sugar together for 3 to 4 minutes until it looks pale and fluffy, almost like fluffy clouds. This aeration is what makes the cake light.
- Incorporate the eggs:
- Add eggs one at a time, beating well after each addition so they fully incorporate before you add the next one. If the mixture looks separated or curdled, don't panic—the flour will smooth it out.
- Alternate flour and milk:
- Add your dry mixture in three parts, alternating with the milk and starting and ending with flour. This keeps the batter smooth and prevents overmixing, which would make the cake tough.
- Divide and bake:
- Pour the batter evenly into the three prepared pans—I use a kitchen scale and divide by weight to ensure they're truly even and bake at the same rate. Bake for 25 to 30 minutes, checking with a toothpick inserted in the center; when it comes out clean, they're done.
- Cool with patience:
- Let the cakes cool in the pans for 10 minutes—this helps them set—then turn them out onto wire racks and let them cool completely. Trying to frost a warm cake is a recipe for melted, sliding layers.
- Make the buttercream base:
- Beat room-temperature butter on high speed for 2 to 3 minutes until it's creamy and pale. Gradually add your sifted powdered sugar on low speed, then add vanilla and milk, and beat on high for 3 minutes until it's light and fluffy.
- Create the ombre effect:
- Divide the buttercream into four bowls—leave one white as your base and add increasingly more pink gel coloring to the other three to create four shades from white to dark pink. The gel coloring matters because liquid coloring will thin out your buttercream.
- Layer and frost:
- Place your first cake layer on a serving plate and spread the darkest pink buttercream on top, then add the second layer and spread the medium pink, then the final layer with the lightest pink on top. Use the white buttercream to cover the sides, and use an offset spatula to smooth everything gently.
- Blend the ombre:
- If you want a blended ombre effect running up the sides, use a bench scraper or a clean spatula and gently stroke from bottom to top to blend the colors together—but this is entirely optional.
- Final decoration and chill:
- Arrange your edible flowers on top of the cake, then pop it in the refrigerator for 30 minutes before slicing. This chill time helps the layers set so your slices come out clean instead of sliding around on the plate.
 Save
Save There's something magical about watching someone's eyes light up when they see a cake you've made with care—even more so when you know you've created it yourself. This cake taught me that impressive doesn't have to mean complicated; it just means paying attention to the details and showing up with intention.
Timing Your Preparation
I learned the hard way that you can't rush this cake the morning of an event. The night before is ideal—bake your layers, let them cool completely, wrap them in plastic wrap, and store them at room temperature. In the morning, make your buttercream, frost, decorate, and chill. This pacing meant my sister wasn't stressed on Mother's Day morning, and the cake itself was fresher and more flavorful because the layers had time to settle and absorb their own moisture.
The Flower Question
Choosing flowers felt like the hardest part until I realized I was overthinking it. The rule is simple: if you're eating the flowers, they must be edible and pesticide-free, which means either growing them yourself or buying from specialty food suppliers. If you're using them purely for decoration, you can use any beautiful flowers—just make sure guests know to remove them before eating. I've seen both approaches look stunning, and honestly, the impact comes from confidence and placement rather than type.
Storage and Serving Secrets
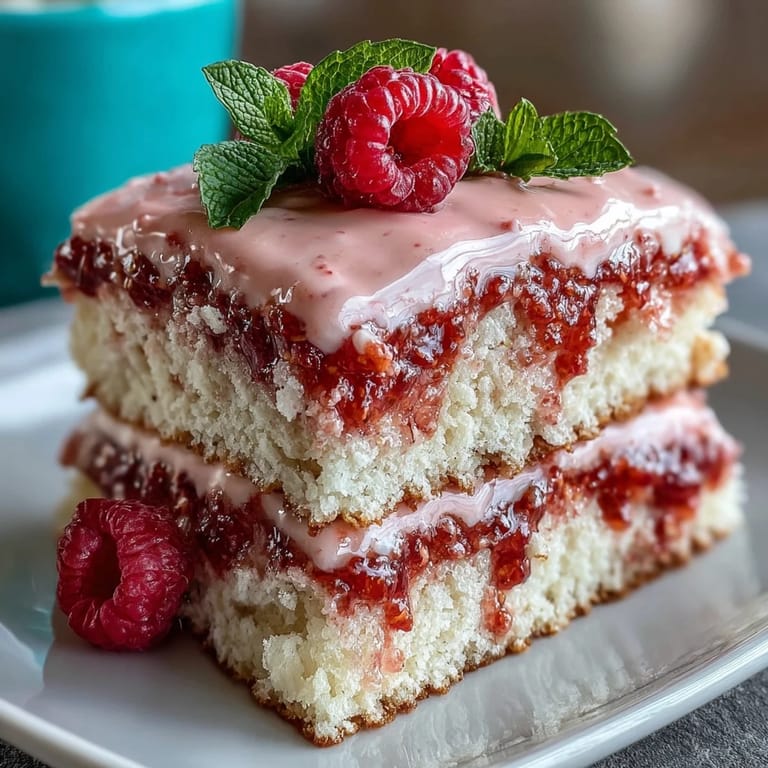
A frosted, decorated cake sits happily in a cool kitchen for up to two days, which takes pressure off your timeline. If it needs to travel, keep it in a cake carrier or box in a cool car. On serving day, slice with a hot, wet knife—dip it in hot water, wipe it clean between slices, and watch those layers reveal themselves with almost no crumb fallout.
- If you're making this ahead, freeze the unfrosted cake layers for up to a week and thaw them the night before frosting.
- The simple syrup brush mentioned in the notes is optional but transforms a dry cake into something impossibly moist—just mix equal parts sugar and water, simmer until clear, cool, and lightly brush each layer.
- Pair this cake with sparkling rosé or a light tea service for a complete Mother's Day moment that feels both luxurious and genuinely from the heart.
 Save
Save Making this cake means you're celebrating not just a person, but the act of showing up in the kitchen and creating something beautiful for someone you love. That's what makes it truly showstopping.
Recipe FAQs
- → How do I achieve the pink ombre effect?
Divide the buttercream into multiple portions and tint each with increasing amounts of pink coloring. Apply from darkest to lightest for a smooth gradient.
- → What flowers are safe for decorating the cake?
Use edible varieties like violets, pansies, and rose petals. Always rinse and dry thoroughly before placing on the cake.
- → Can I prepare the sponge layers in advance?
Yes, sponge layers can be baked ahead and wrapped well to maintain moisture until assembly.
- → How to keep the buttercream smooth and creamy?
Beat butter until fluffy before gradually adding powdered sugar and liquids, mixing well to avoid lumps.
- → Any tips for clean knife cuts through layered buttercream?
Chill the assembled cake for at least 30 minutes before slicing to firm up the layers and reduce smudging.