 Save
Save Last summer, I was frantically packing for a hiking trip when my friend texted asking what snacks I was bringing. I stood in my kitchen staring at a half-empty pantry, realizing I had nothing but oats and peanut butter—and somehow, those two humble ingredients sparked the idea for these bars. What started as a kitchen improvisation became something I now make constantly, not just for adventures but for quiet mornings when I want something that tastes indulgent but actually fuels me.
My neighbor asked for the recipe after I brought a batch to a potluck, and when she made them the next week, she called to say her kids actually ate something healthy without complaining. That moment made me realize these bars had crossed from being my personal solution into something genuinely useful for busy families, weekend warriors, and anyone tired of store-bought snacks that taste like cardboard.
Ingredients
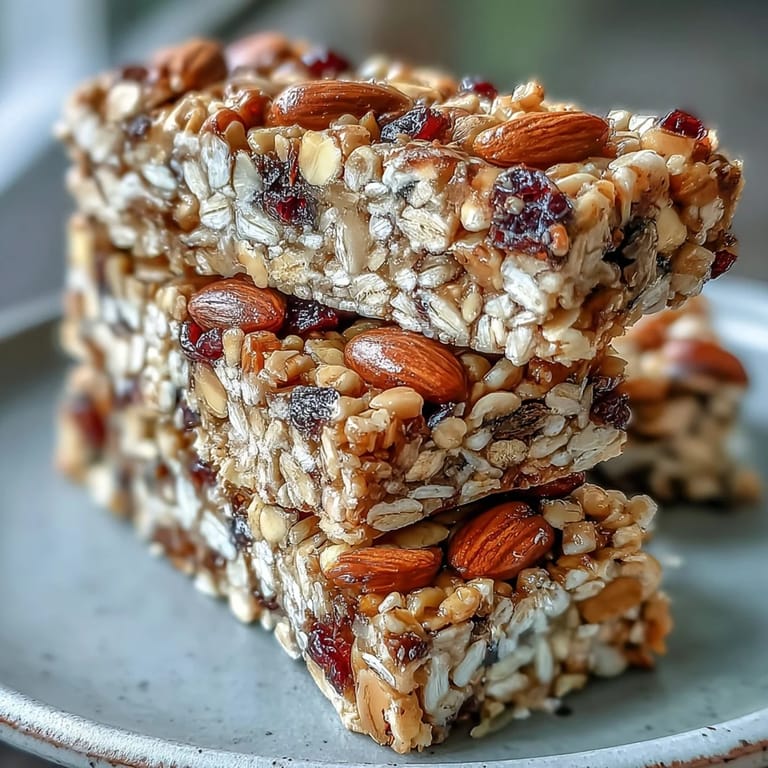
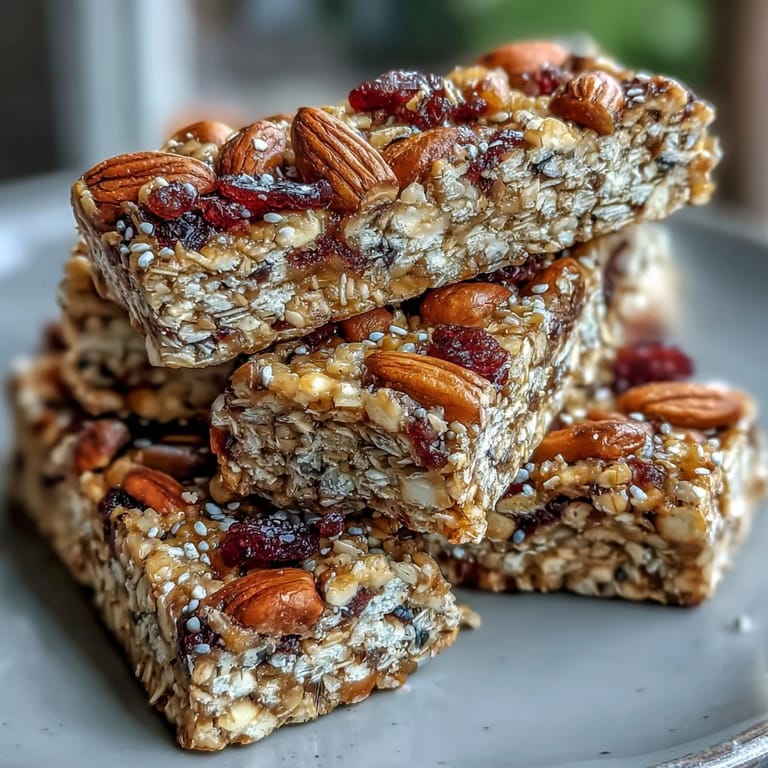
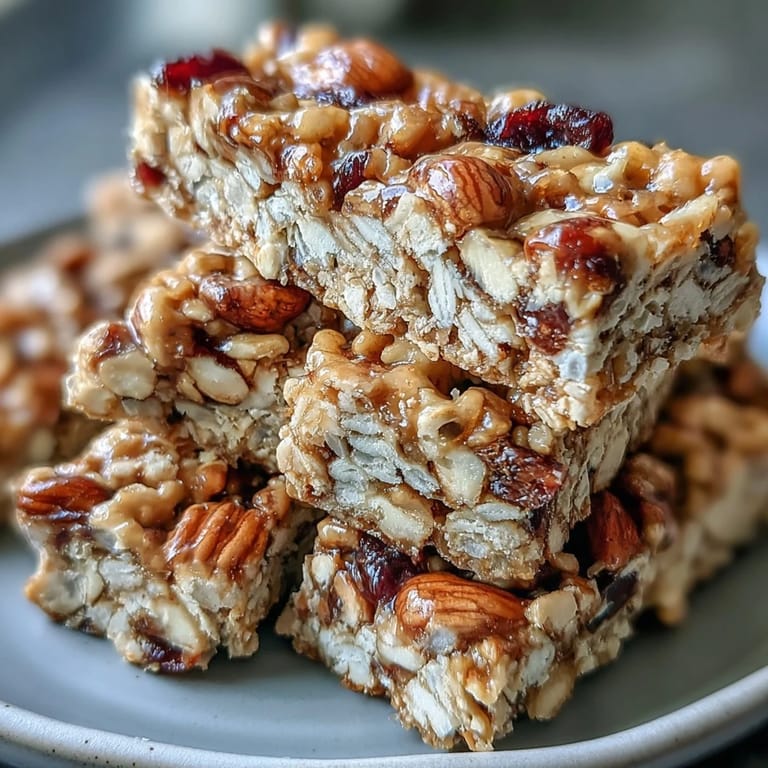
- Old-fashioned rolled oats (2 cups): These provide the chewy backbone and keep everything bound together; avoid instant oats, which break down into mush.
- Crisp rice cereal (1 cup): This adds lightness and a subtle crunch that keeps the bars from feeling dense.
- Mixed nuts, chopped (1/2 cup): I use almonds, walnuts, and pecans for variety, but whatever you have works—just chop them fairly fine so they distribute evenly.
- Dried fruit (1/2 cup): Cranberries and apricots are my go-tos, though raisins work beautifully and add natural sweetness.
- Unsweetened shredded coconut (1/4 cup, optional): This brings a subtle tropical note without overwhelming the other flavors.
- Salt (1/4 teaspoon): A pinch that most people won't notice but that makes everything taste more intentional.
- Honey or maple syrup (1/2 cup): The glue holding everything together; I prefer maple syrup because it feels less heavy, but use whatever sweetener you trust.
- Peanut or almond butter (1/3 cup): Creamy works best because it melts smoothly and coats everything without leaving dry pockets.
- Vanilla extract (1 teaspoon): A small detail that lifts the whole flavor profile upward.
- Mini chocolate chips (1/4 cup, optional): Add these only if you want that little hit of richness; they're not necessary but they do make things special.
- Chia seeds or flaxseed meal (1 tablespoon, optional): A bonus for extra nutrition if you're feeling it.
Tired of Takeout? 🥡
Get 10 meals you can make faster than delivery arrives. Seriously.
One email. No spam. Unsubscribe anytime.
Instructions
- Prep your pan like you mean it:
- Line an 8-inch square baking pan with parchment paper, letting the edges hang over the sides—this is how you'll lift everything out without wrestling with stuck bars. Trust me on this one.
- Combine all your dry goods:
- In a large bowl, mix the oats, rice cereal, nuts, dried fruit, coconut, and salt, making sure everything is evenly distributed. This is actually satisfying, watching all those textures come together.
- Warm the sticky stuff:
- In a small saucepan over low heat, combine the honey and peanut butter, stirring gently until everything is smooth and melted, about 2 to 3 minutes. The kitchen will smell incredible at this point—sweet, nutty, like you're making something worth eating.
- Bring everything together:
- Pour the warm mixture over your dry ingredients and mix thoroughly until every oat, every nut, every piece of fruit is coated in that golden sweetness. This takes some muscle, but that's part of the ritual.
- Add chocolate carefully if you're using it:
- Let the mixture cool for 2 to 3 minutes before folding in mini chocolate chips; this prevents them from melting into a sad puddle and keeps them as distinct little pockets of joy.
- Press into the pan with intention:
- Transfer the mixture to your prepared pan and press firmly and evenly using a spatula or the back of a measuring cup until it's compact and even. This is where you control the texture—press harder for denser bars, lighter if you prefer something less chunky.
- Dress it up on top:
- Sprinkle additional chocolate chips or nuts on the surface and press them in gently so they stick around during chilling and eating.
- Chill until set:
- Refrigerate for at least 1 hour until the bars are firm enough to cut without falling apart. You can make these in the morning and have them ready by evening.
- Cut and store:
- Lift the entire slab from the pan using the parchment overhang, then cut into 12 bars using a sharp knife. Store in an airtight container in the refrigerator for up to 1 week, though they rarely last that long.
 Save
Save The real magic happened when my mom tried one while watching me pack for a work trip, and she quietly asked if I could make her a batch for her book club. Suddenly, this kitchen experiment wasn't just about convenient snacking anymore—it was something that brought people together around a table, a small gesture that somehow meant more than its simple ingredients suggested.
Flavor Variations Worth Trying
Once you've made these once, your kitchen brain starts spinning with possibilities. I've done a fall version with cinnamon and chopped apricots, a tropical remix with coconut flakes and dried mango, and even a dark chocolate and cherry situation that felt almost decadent. The base is so forgiving that you can follow your mood and whatever looks good at the store that week.
Making Them Allergy-Friendly
Not everyone can eat peanuts, and that used to limit who I could share these with until I started experimenting with sunflower seed butter and tahini. A friend with a tree nut allergy asked if I could make a version using seeds instead, and honestly, the sunflower seed version became equally beloved—sometimes substitutions create something just as good as the original.
Storage and Make-Ahead Magic
These bars live happily in an airtight container in the refrigerator for up to a week, which means you can make a big batch on Sunday and have grab-and-go snacks ready for whatever chaos the week throws at you. I sometimes wrap individual bars in parchment and freeze them for longer storage, which also means grabbing one straight from the freezer gives you a naturally chilled treat by lunchtime.
- An airtight container keeps them from drying out or absorbing fridge smells.
- Wrap individual bars in parchment paper before storing if you want to grab one without touching the others.
- Freezing extends their life to about 3 weeks, and they thaw beautifully at room temperature in an hour.
 Save
Save These bars have become my answer to so many moments—the Sunday before a busy week, the snack for a friend's long drive, the thing I bring when I want to contribute something homemade. They're proof that simple really can be enough.
Recipe FAQs
- → Can I substitute nut butter for allergies?
Yes, sunflower seed butter works well as a nut-free alternative while maintaining creamy texture.
- → How long do the bars stay fresh?
Stored in an airtight container in the refrigerator, the bars remain fresh for up to one week.
- → Is it possible to add chocolate chips without melting?
Let the mixture cool slightly before folding in chocolate chips to prevent melting and maintain shape.
- → Can I add spices for extra flavor?
Cinnamon or cardamom can be added to enhance the taste and provide a warm, aromatic touch.
- → Are these bars suitable for vegans?
Use maple syrup instead of honey and choose dairy-free chocolate chips to make a vegan-friendly version.