 Save
Save My sister brought a box of Nutter Butters to my apartment one rainy Saturday with no plan except to bake something ridiculous. We stood in my tiny kitchen, staring at that iconic peanut-shaped cookie, and I thought: what if we turned this into cheesecake? Two hours later, we were scraping the bowl clean with our fingers, laughing at how something so simple tasted so indulgent. That spontaneous afternoon became the blueprint for every celebration dessert I make now.
I made this for my nephew's birthday last spring, and he insisted on helping me crush the cookies. He smashed them with a rolling pin like he was fighting off a monster, and by the time we pressed that buttery crust into the pan, half the crumbs were on the floor. But when he took his first bite after dinner, he looked up at me with frosting on his nose and said it was the best thing he'd ever tasted. I believed him.
Ingredients
- Nutter Butter cookies: These are the soul of the dessert, bringing that iconic peanut butter flavor and a sturdy base that holds up beautifully under pressure.
- Unsalted butter: Melted and mixed with the crushed cookies, it binds everything into a crust that bakes up golden and crisp without turning greasy.
- Cream cheese: Softened to room temperature, it whips into a cloud that makes the filling impossibly smooth and prevents lumps you will regret later.
- Granulated sugar: Just enough sweetness to balance the tangy cream cheese and let the peanut butter shine through without overwhelming your palate.
- Vanilla extract: A whisper of warmth that rounds out all the flavors and makes everything taste more intentional, more complete.
- Eggs: They give structure and that signature cheesecake wobble, but only if you add them gently and avoid over-mixing the batter.
- Creamy peanut butter: The star player, swirled through the filling to create ribbons of nutty richness that make every slice different and exciting.
- Heavy whipping cream: Whipped with powdered sugar into stiff peaks, it crowns the chilled cheesecake with airy sweetness that melts on your tongue.
- Powdered sugar: It sweetens the whipped cream without adding grit, dissolving instantly and giving you that silky, professional finish.
- Chopped peanuts: Optional but recommended, they add a salty crunch that wakes up the whole dessert and makes it feel complete.
- Additional Nutter Butter cookies: For garnish, because presentation matters and because you can never have too many of these cookies in one place.
Tired of Takeout? 🥡
Get 10 meals you can make faster than delivery arrives. Seriously.
One email. No spam. Unsubscribe anytime.
Instructions
- Prep Your Pan:
- Preheat your oven to 325°F and grease a 9-inch springform pan, then line the bottom with parchment paper so nothing sticks when you release that glorious cheesecake later. This step saves heartbreak.
- Build the Crust:
- Mix your crushed Nutter Butters with melted butter until it looks like wet sand, then press it firmly into the bottom of the pan using the back of a measuring cup for an even layer. Bake for 10 minutes and let it cool completely.
- Cream the Base:
- Beat softened cream cheese and granulated sugar together with an electric mixer on medium speed until the mixture is smooth, fluffy, and free of lumps, about 2 to 3 minutes. Patience here pays off in texture.
- Fold in Flavor:
- Add vanilla extract and creamy peanut butter, mixing until they disappear into the cream cheese and the whole bowl smells like heaven. Scrape down the sides so nothing hides.
- Incorporate Eggs:
- Add eggs one at a time on low speed, beating just until each one blends in before adding the next. Over-mixing now will give you cracks later, and nobody wants that drama.
- Pour and Smooth:
- Pour the cream cheese mixture over your cooled crust and smooth the top with a spatula, coaxing it into an even layer. Tap the pan gently on the counter to release any air bubbles hiding inside.
- Bake Low and Slow:
- Bake for 50 to 60 minutes until the edges are set but the center still has a gentle jiggle when you shake the pan. It will firm up as it cools, trust the process.
- Cool Gradually:
- Turn off the oven, crack the door open, and let the cheesecake cool inside for 1 hour to avoid sudden temperature changes that cause cracks. This is the secret to a smooth top.
- Chill Completely:
- Remove the cheesecake from the oven and refrigerate it for at least 4 hours, or overnight if you can wait. The flavors deepen and the texture becomes perfectly sliceable.
- Whip the Topping:
- Before serving, whip heavy cream with powdered sugar until stiff peaks form and the cream holds its shape when you lift the beaters. Do not over-whip or you will end up with butter.
- Garnish and Serve:
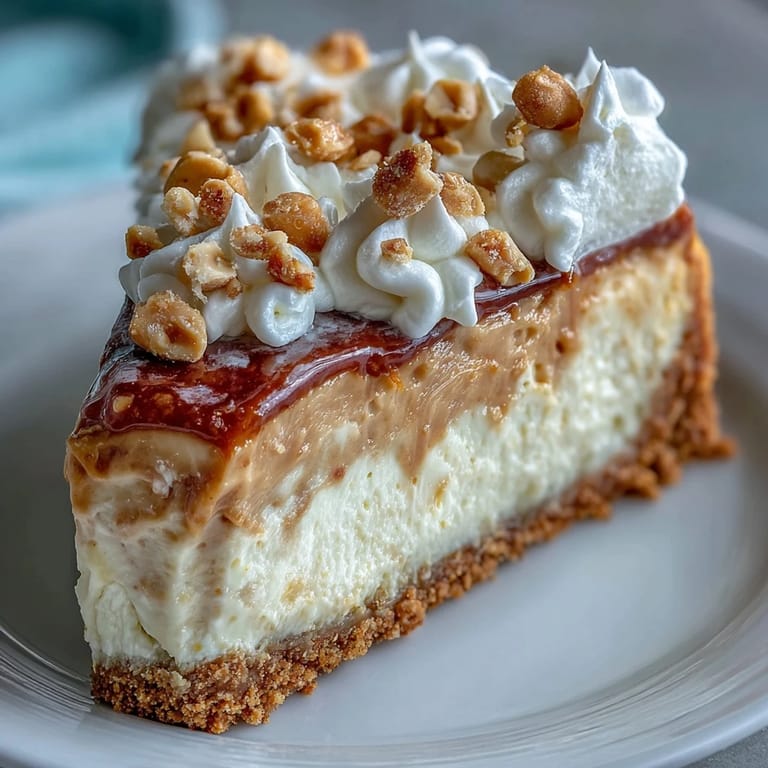
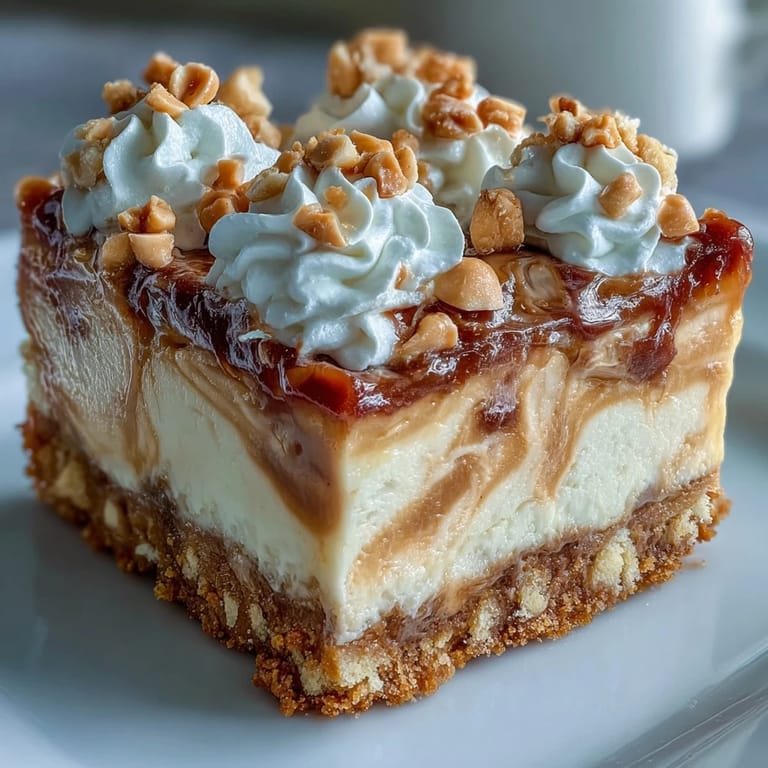
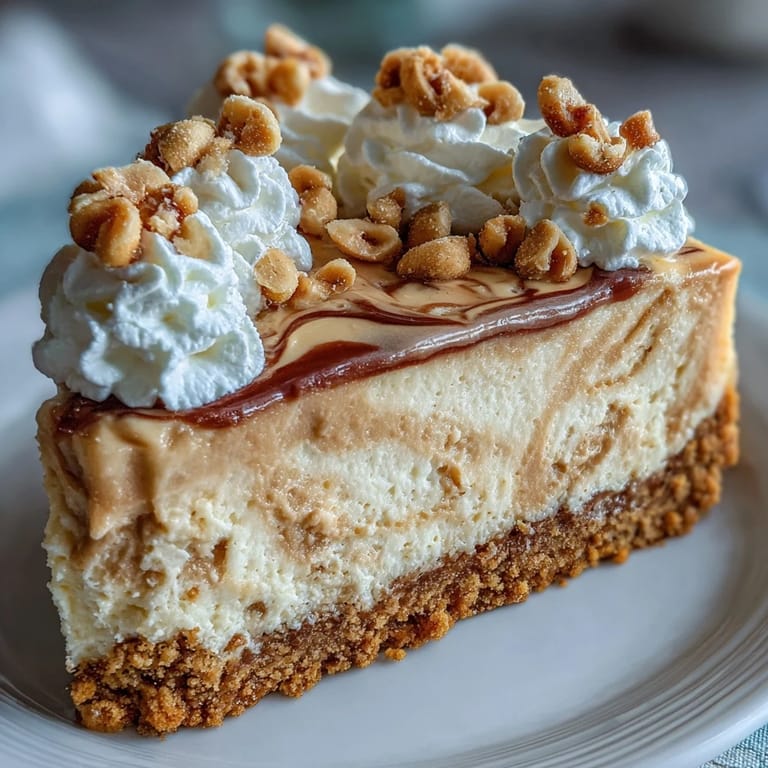
- Spread the whipped cream over the chilled cheesecake, then sprinkle with chopped peanuts and extra Nutter Butter cookies. Slice with a hot, clean knife for the prettiest pieces.
 Save
Save The first time I served this at a dinner party, my friend who claimed she did not like peanut butter came back for seconds. She stood in my kitchen with her plate, fork poised mid-air, and admitted she might have been wrong her whole life. That is the moment I knew this cheesecake was not just dessert, it was a converter.
How to Avoid Cracks
Cheesecake cracks happen when the top cools faster than the center, creating tension that splits the surface like a tiny earthquake. The slow oven cool-down is your best defense, but if you want extra insurance, bake it in a water bath by wrapping the springform pan in foil and setting it in a roasting pan filled with hot water. The steam keeps everything moist and even, and you will get a top so smooth it looks airbrushed.
Make-Ahead Magic
This cheesecake actually improves after a night in the fridge, as the flavors meld and the texture firms into something sliceable and divine. I always make mine the day before I need it, then add the whipped cream and garnish right before serving so everything looks fresh and intentional. It takes the pressure off party day and gives you one less thing to worry about when guests arrive.
Serving Suggestions
This dessert is rich enough to stand alone, but if you want to gild the lily, drizzle warm chocolate or caramel sauce over each slice just before it hits the plate. I have also served it with a tiny scoop of vanilla ice cream on the side, which melts into the whipped cream and turns every bite into a sundae situation. For a crowd, slice it into smaller pieces because a little goes a long way, and everyone will want seconds anyway.
- Use a hot knife wiped clean between cuts for the sharpest, prettiest slices that do not smear or drag.
- Store leftovers covered in the fridge for up to five days, though it rarely lasts that long in my house.
- If you are feeling fancy, pipe the whipped cream on top instead of spreading it for a bakery-style finish.
 Save
Save Every time I pull this cheesecake out of the fridge, I remember that rainy Saturday and my sister's wild idea that turned into something we still talk about. It is proof that the best recipes are born from curiosity, a little chaos, and the willingness to see where the crumbs lead you.
Recipe FAQs
- → How long should I chill the cheesecake before serving?
Refrigerate the cheesecake for at least 4 hours, though overnight chilling produces the best texture and flavor. This allows the filling to set completely and the flavors to meld together beautifully.
- → Can I use a water bath for this cheesecake?
Yes, using a water bath creates an even creamier texture and helps prevent cracks. Simply wrap the bottom of your springform pan with foil and place it in a roasting pan filled with hot water halfway up the sides.
- → How do I know when the cheesecake is done baking?
The cheesecake is ready when the edges are set but the center still has a slight jiggle. This residual heat will complete the cooking process as it cools. Over-baking can lead to cracks and a dry texture.
- → Can I make this dessert ahead of time?
Absolutely! In fact, making it a day ahead enhances the flavor. You can prepare the entire cheesecake up to 24 hours before serving. Add the whipped cream and garnish just before serving for the freshest presentation.
- → What other toppings work well with this cheesecake?
While whipped cream and chopped peanuts are classic, you can also drizzle with chocolate or caramel sauce, add a layer of melted peanut butter on top, or sprinkle with crushed cookie pieces for extra crunch and visual appeal.
- → Why should I let the cheesecake cool in the oven with the door cracked?
This gradual cooling method prevents sudden temperature changes that can cause cracks on the surface. Leaving the door slightly ajar allows the heat to escape slowly while the cheesecake settles, ensuring a smooth and professional appearance.