 Save
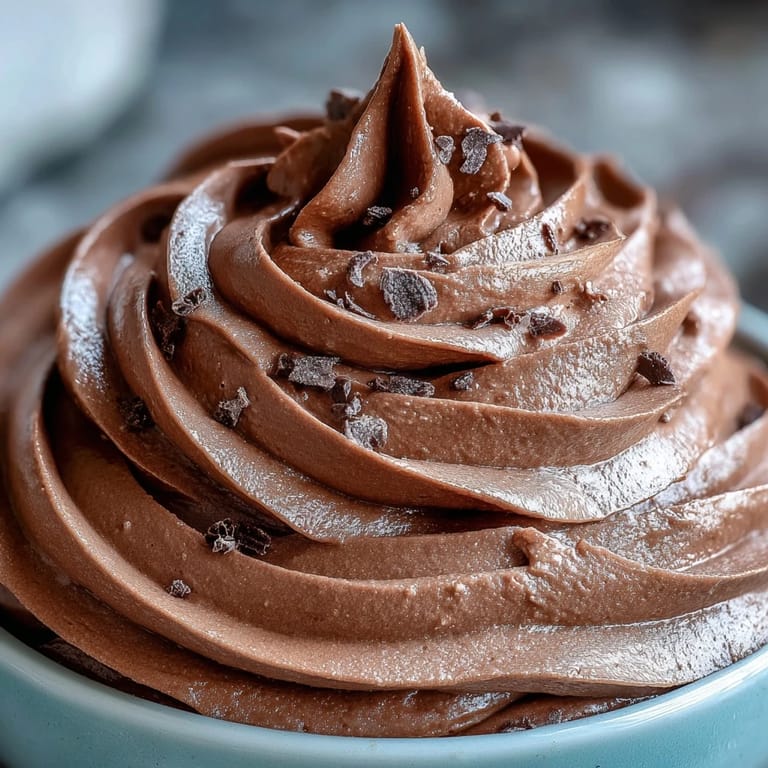
Save My sister called in a panic two hours before her dinner party, convinced her chocolate cake needed something more. I was at my kitchen counter when she described what she wanted—something silky that would make people close their eyes after the first bite. That's when I remembered this mousse, a filling so simple it felt almost like cheating, yet so elegant it stopped conversations. The beauty of it is how quickly you can pull it together while your cake cools, turning a good dessert into something memorable.
I made this for my neighbor's birthday potluck last spring, and she kept asking for the recipe while standing in my kitchen holding a fork. There's something about watching someone taste chocolate mousse for the first time that reminds you why cooking matters. She ended up making it for her book club, and apparently it sparked a fifteen-minute debate about whether it was actually easy to make or if she was hiding culinary secrets. The answer, of course, is that restraint and cold cream are the real magic.
Ingredients
- Semi-sweet chocolate, 7 oz (200g), chopped: Quality matters here more than anywhere else—this is the star, so choose chocolate you'd actually enjoy eating on its own, around 55 to 65 percent cocoa for the right balance of bitterness and sweetness.
- Heavy whipping cream, 1 cup (240ml), cold: The cold matters because it whips faster and holds its structure better; I've learned to keep mine in the fridge until the exact moment I need it.
- Powdered sugar, 2 tablespoons: This dissolves smoothly into the cream without the grittiness of granulated sugar, though you can adjust upward if you prefer sweeter mousse.
- Pure vanilla extract, 1 teaspoon: Don't skip this—it deepens the chocolate flavor in a way that seems small until you taste the difference.
- Salt, a pinch (optional): Only add this if your chocolate is unsalted; it wakes up the chocolate flavor and makes it sing.
Tired of Takeout? 🥡
Get 10 meals you can make faster than delivery arrives. Seriously.
One email. No spam. Unsubscribe anytime.
Instructions
- Melt the chocolate gently:
- Place your chopped chocolate in a heatproof bowl and set it over simmering water (a double boiler), stirring until it's completely smooth, or use the microwave method—20 seconds at a time, stirring between bursts so you don't overheat it. The chocolate should cool to room temperature before you touch it with cream; warm chocolate will melt the whipped cream and ruin your fluffy texture.
- Whip the cream to soft peaks:
- Pour cold cream into a chilled bowl (I run mine under cold water first), add the powdered sugar and vanilla, then whip with a mixer until soft peaks form—the cream should hold a shape but still look pillowy and droopy, not stiff. Stop as soon as you see stiff peaks forming, because one more rotation of the whisk and you're making butter.
- Fold chocolate and cream together:
- Once your chocolate is cool but still pourable, add just one spoonful of whipped cream to the chocolate bowl and stir gently to loosen it up, then add the rest of the cream in 2 or 3 additions, folding with a rubber spatula in slow, careful motions. You're trying to keep all that air you just whipped into the cream, so fold gently from the bottom up rather than stirring; stop when you see no chocolate streaks.
- Chill before using:
- For mousse that holds its shape when you slice or pipe it, refrigerate for 30 to 60 minutes; if you want it softer and more spoonable, use it right away or give it just 15 minutes. The texture changes as it sets, so think about how you want to use it before you chill.
 Save
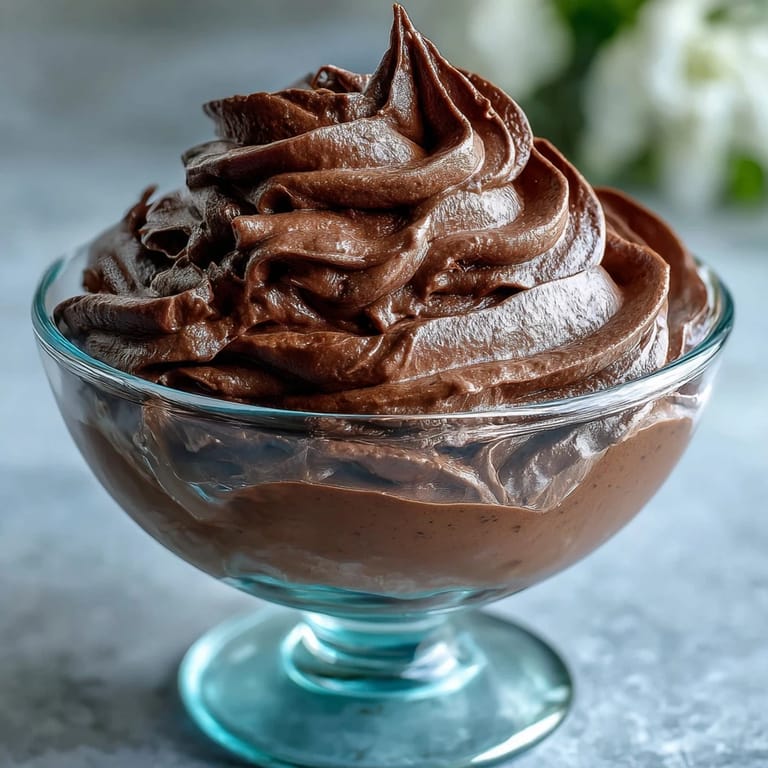
Save I once brought this mousse to a midnight dessert party at my friend's apartment, and we ended up eating it with tiny spoons straight from the bowl while sitting on the kitchen counter at 2 AM, talking about everything and nothing. That's when I realized mousse isn't just a cake filling—it's the kind of thing that makes ordinary moments feel a little more special, the edible equivalent of pausing to actually taste your life.
Making It Work for Different Desserts
As a cake filling, this mousse is forgiving because it doesn't drip or ooze like some fillings do—it stays put between your layers, which means you can frost the outside while the filling holds firm. For cupcakes, I've found that piping it in with a pastry bag makes you look like you know what you're doing, even if you made it while your coffee was still hot. If you're serving it as a standalone dessert in small cups or glasses, you can let it chill a full two hours and it becomes almost mousse-like in texture—fancier, somehow, because you took the time.
Flavor Variations That Surprised Me
The basic recipe is perfect as-is, but I've played with it enough to know where it can go. A splash of espresso powder stirred into the warm chocolate deepens everything without tasting like coffee; cinnamon or a tiny pinch of cayenne adds intrigue; and once I added a teaspoon of almond extract and regretted nothing. The chocolate is so prominent that you can't hide much, so any additions should be subtle—think seasoning, not competing flavors.
Storage and Make-Ahead Thinking
This mousse lives in the refrigerator for up to two days if you cover it with plastic wrap, though honestly it tastes best the day you make it when the texture is still at its fluffiest. I don't recommend freezing it because the separation that happens as it thaws breaks the silky texture you worked so hard to achieve. If you're planning a dinner party and want to get ahead, you can make the mousse the morning of and use it the same evening, keeping it chilled until assembly time.
- Cover mousse tightly to prevent it from absorbing fridge smells or drying out on top.
- If it sits for a few days, give it a gentle stir with a spatula before using, as it may separate slightly.
- Never leave it at room temperature for more than an hour, as the cream can start breaking down.
 Save
Save This mousse has become my secret weapon for turning simple cakes into something worth talking about. It's the kind of recipe that reminds you that cooking doesn't have to be complicated to be delicious.
Recipe FAQs
- → What type of chocolate is best to use?
Semi-sweet chocolate with 55–65% cocoa content works best, providing a balanced richness without excessive bitterness.
- → How long should the mousse be chilled?
Chilling for 30 to 60 minutes firms the mousse for slicing or piping; longer chilling results in a denser texture.
- → How do I achieve a light, fluffy texture?
Whip the cream until soft peaks form and gently fold it into cooled melted chocolate, preserving airiness for a soft texture.
- → Can this filling be prepared in advance?
Yes, it can be refrigerated covered for up to two days but should not be frozen to maintain texture and flavor.
- → Are there flavor variations to try?
Add a splash of espresso or a pinch of cinnamon to the melted chocolate to deepen and enhance the flavor profile.
- → Is this suitable for special diets?
It is vegetarian and gluten-free, but be sure to check the chocolate packaging for potential allergens like soy or nuts.