 Save
Save My sister called in a panic two days before Easter, asking if I had any ideas that would make her kids actually excited about lunch instead of just tolerating it. I remembered pulling out a bunny cookie cutter from the back of a drawer and thinking, why not turn something as simple as a quesadilla into a little edible craft project? The moment those golden, cheese-filled bunnies came out of the oven with their olive eyes and carrot noses, I knew I'd stumbled onto something special. What started as a last-minute save became the thing her kids requested every spring since.
I made a batch of these for my nephew's classroom Easter party, and watching him march around showing everyone that his quesadilla had a carrot nose made me realize food doesn't have to be complicated to be memorable. The teacher told me later that three kids asked their parents for the recipe, which meant I'd accidentally created something that stuck with them beyond just that afternoon. That's when I understood the real magic wasn't the ingredients—it was the permission to make eating fun again.
Ingredients
- Large flour tortillas: Six tortillas give you enough to cut into 12 bunny shapes, and you'll want them to be sturdy enough to hold cheese without tearing when you cut.
- Shredded cheddar cheese: The sharpness cuts through the buttery tortilla, but don't skip shredding your own if you can—pre-shredded gets clumpy when it melts.
- Shredded mozzarella cheese: This is your stretchy layer that makes every bite satisfying and helps the two tortillas stick together as they cook.
- Diced bell peppers: Any color works, but the brighter ones add visual joy alongside the bunny shapes and keep things from tasting too heavy.
- Sweet corn kernels: Fresh or canned both work fine; the sweetness balances the savory cheese and butter beautifully.
- Unsalted butter, melted: This is what gives your bunnies that golden, crispy exterior that shatters slightly when you bite down.
- Black olive slices: Use the bigger ones so they don't disappear into the cheese; they're your bunny's soulful eyes.
- Baby carrots: A thin slice becomes the perfect nose; thick carrot pieces overwhelm the bite.
- Fresh parsley or cilantro: The cilantro option surprised me, but those herbal whiskers add a little flavor dimension that feels less predictable than parsley alone.
Tired of Takeout? 🥡
Get 10 meals you can make faster than delivery arrives. Seriously.
One email. No spam. Unsubscribe anytime.
Instructions
- Heat your oven and prep your space:
- Set the oven to 375°F and line your baking sheet with parchment paper so cleanup becomes almost laughable. This step sounds boring until you realize you've already won half the battle by not scrubbing melted cheese off your pan later.
- Cut your bunny shapes:
- Using your cookie cutter or a knife and template, cut each tortilla into bunny shapes—you'll get about two per tortilla. Work slowly here; tortillas tear easily, and a torn bunny is still delicious but looks like it had a rough morning.
- Build your first layer:
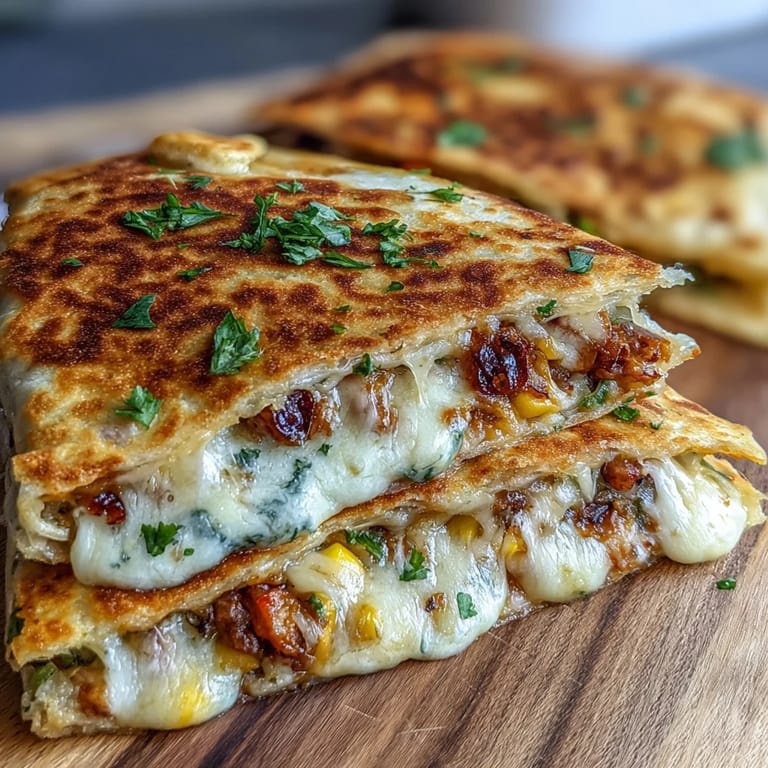
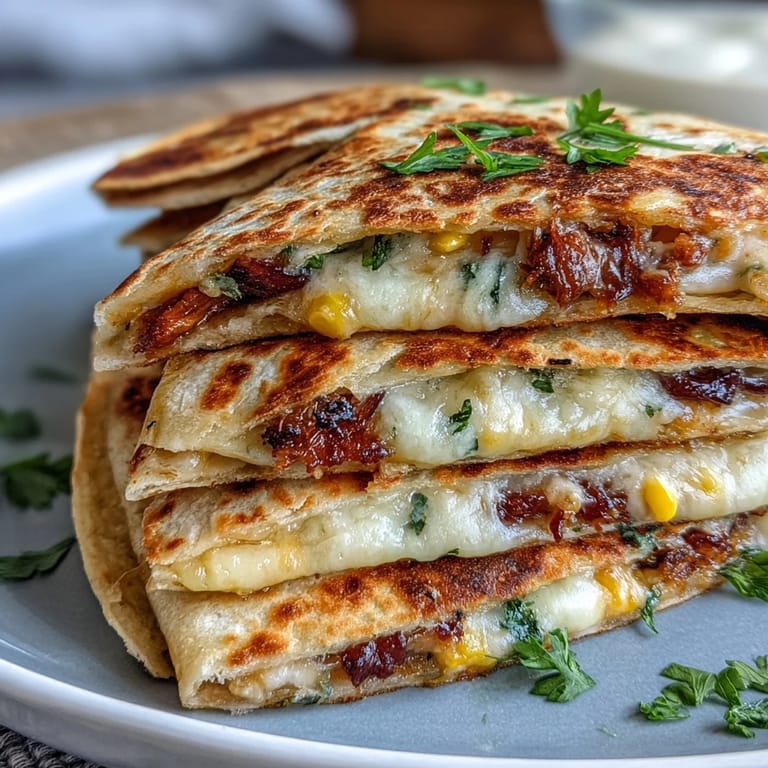
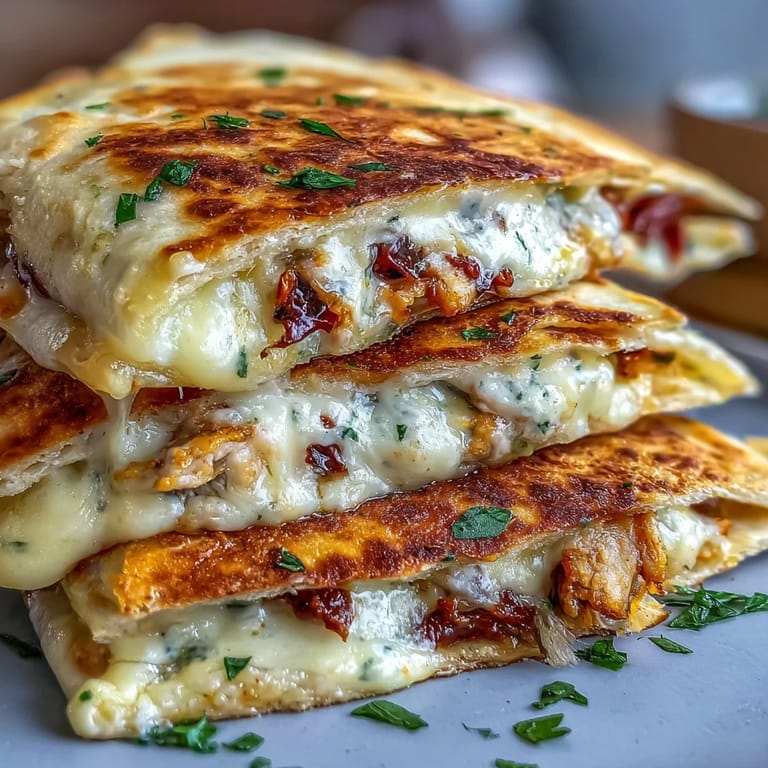
- Place half your bunny cutouts on the parchment and sprinkle with both cheeses, then scatter the bell peppers and corn across the top. Don't be shy with the filling; the cheese will stay put as it melts.
- Top and brush:
- Lay a second tortilla bunny on top of each filled one and brush the tops with melted butter using a pastry brush or even your clean fingers. This butter is what transforms them from soft to crispy and golden.
- Bake until golden:
- Pop them in the oven for 8 to 10 minutes until the cheese bubbles slightly at the edges and the tortillas turn that perfect shade of golden brown. You'll smell when they're almost done—that nutty, toasted butter aroma is your timer.
- Decorate while warm:
- Let them cool just long enough that you can touch them without burning yourself, then press the olive eyes, carrot nose, and parsley whiskers onto each bunny. The warmth helps everything stick without needing any adhesive at all.
- Serve with dipping sauce:
- A dollop of sour cream on the side makes it feel fancier than it is, and kids love having something to dunk.
 Save
Save My mom texted me a photo last month of her making these with my young nieces, all three of them huddled around the counter with flour dust on their faces, laughing at the wonky bunny they'd accidentally created together. That image meant more to me than any perfectly shaped batch ever could.
Making These Your Own
The beauty of quesadillas is that they're forgiving enough to handle improvisation without falling apart. I've added shredded rotisserie chicken on days when I wanted more protein, stirred in black beans for extra heartiness, and even experimented with a tiny drizzle of hot sauce mixed into the cheese for adults who wanted a whisper of heat. Once you nail the basic construction, you're free to swap vegetables or add whatever's lingering in your fridge.
The Decoration Part Matters More Than You'd Think
The moment a kid sees a carrot nose on their plate, something shifts—it's no longer just food, it's a character with personality. I've learned that the extra two minutes spent pressing on eyes and whiskers pays dividends in enthusiasm. Even the picky eaters seem more willing to eat something that looks back at them.
When You're Short on Time or Ingredients
You can absolutely skip the decoration if mornings are hectic or supplies are limited; plain bunny-shaped quesadillas are still delightful and require zero extra effort. The filling can adapt to whatever cheese you have—even a single melty cheese works fine. Here are the shortcuts that actually work:
- Use a regular round cookie cutter or just cut triangles; the shape is fun but not essential to the taste.
- Skip the fresh herbs and use any crunchy element you like—shredded carrots, sautéed mushrooms, or caramelized onions all bring their own magic.
- Frozen corn works just as well as fresh, and honestly, most kids can't tell the difference anyway.
 Save
Save There's something quietly wonderful about serving food that makes people smile before they even taste it. These bunny quesadillas have earned their place in my regular rotation not because they're complicated, but because they remind me that the smallest touches—a carrot nose, a fresh sprig of parsley—can transform an ordinary lunch into something worth remembering.
Recipe FAQs
- → What cheese types work best for these quesadillas?
Shredded cheddar and mozzarella provide a perfect balance of flavor and meltability, creating a creamy and crispy texture.
- → Can these quesadillas be customized with other fillings?
Yes, adding cooked shredded chicken, black beans, or different vegetables is a great way to customize taste and nutrition.
- → How do I keep the tortilla shapes intact during baking?
Using a bunny-shaped cookie cutter ensures clean cuts. Layer carefully and brush melted butter on top to encourage golden crispness without falling apart.
- → What sides pair well with these quesadillas?
Light fruit salads or crunchy veggie sticks complement the cheesy richness and add freshness to the snack.
- → Are there vegetarian options for this snack?
Yes, using only cheese, vegetables, and tortillas keeps this dish vegetarian-friendly while maintaining great flavor.