 Save
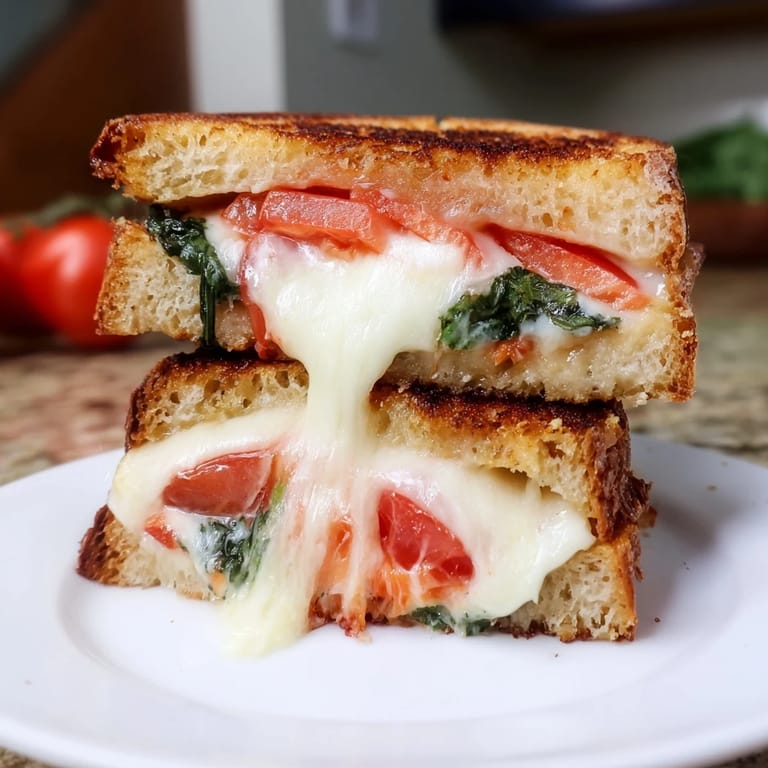
Save My neighbor handed me three tomatoes from her garden, still warm from the sun, and I knew immediately what I was making for lunch. I had been eating the same plain grilled cheese for weeks, but something about those tomatoes made me want to try something different. I pulled out some mozzarella, grabbed the basil plant from my windowsill, and decided to wing it. The smell of butter hitting the hot skillet still makes me smile. That sandwich turned an ordinary Tuesday into something I still crave on rainy afternoons.
I made this for my sister once when she dropped by unexpectedly, exhausted from a long day. She sat at my kitchen counter, quiet and tired, and I just started assembling the sandwich without asking what she wanted. When I slid the plate in front of her, she took one bite and her whole face changed. She said it tasted like comfort, and I think that is exactly what a grilled cheese should be.
Ingredients
- Rustic or sourdough bread: The texture and slight tang of good bread make all the difference here, giving you that perfect crispy outside and soft inside contrast.
- Unsalted butter, softened: Softened butter spreads easily and evenly, which means no tearing the bread and a beautifully golden crust every time.
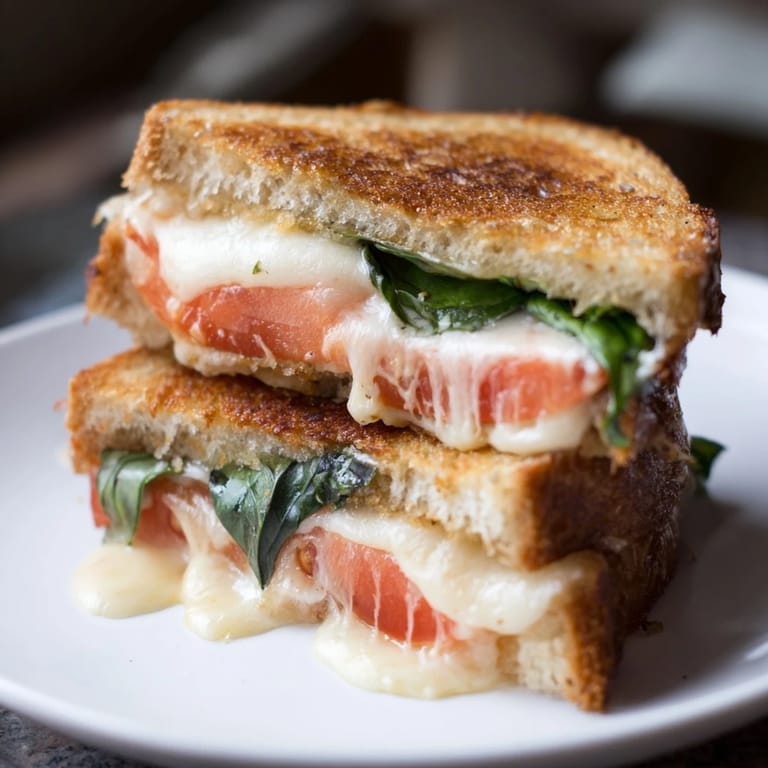
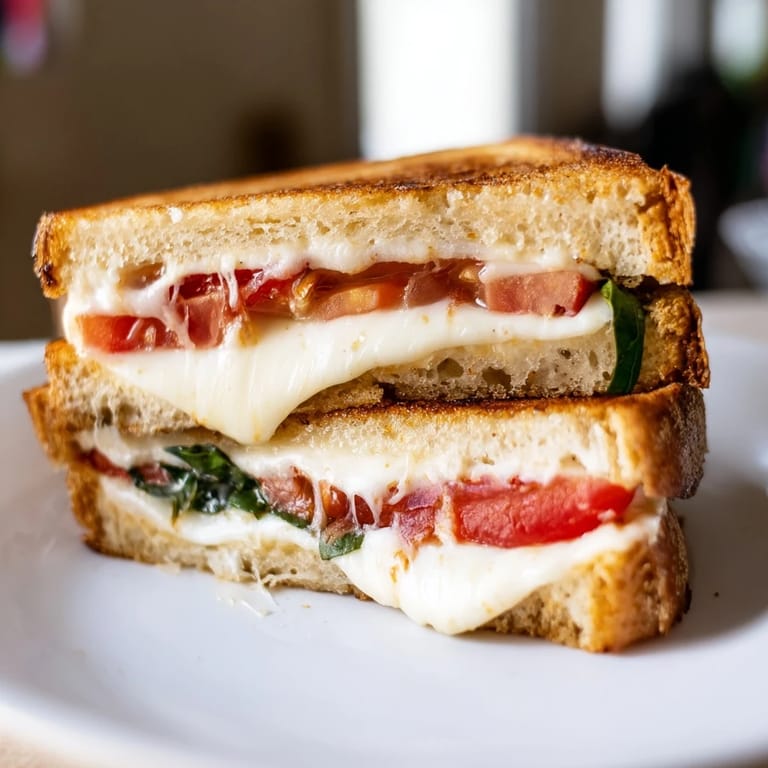
- Fresh mozzarella: This cheese melts into creamy, stretchy perfection without being too heavy or greasy like some other cheeses can be.
- Ripe tomato: A juicy, ripe tomato adds sweetness and acidity that balances the richness of the cheese and butter.
- Fresh basil leaves: Fresh basil brings a peppery, aromatic lift that makes the whole sandwich taste alive and bright.
- Salt and black pepper: Just a pinch of each wakes up the tomato and ties all the flavors together without overpowering anything.
Tired of Takeout? 🥡
Get 10 meals you can make faster than delivery arrives. Seriously.
One email. No spam. Unsubscribe anytime.
Instructions
- Butter the bread:
- Lay out all four slices and spread softened butter evenly on one side of each. This is your golden ticket to that crispy, buttery crust.
- Start layering:
- Place two slices buttered side down on your counter, then layer on the mozzarella, tomato slices, and basil leaves. Season with a little salt and pepper right on top of the tomatoes.
- Close the sandwiches:
- Top each with the remaining bread slices, buttered side up. Press down gently so everything sticks together a bit.
- Heat your skillet:
- Set a non-stick skillet or griddle over medium heat and let it warm up for a minute or two. You want it hot enough to sizzle but not so hot that the bread burns before the cheese melts.
- Cook the sandwiches:
- Place both sandwiches in the skillet and cook for 3 to 4 minutes on the first side, pressing gently with a spatula. Flip carefully and cook another 3 to 4 minutes until golden brown and the cheese is melted and gooey.
- Rest and serve:
- Remove from the pan and let them sit for just a minute so the cheese sets slightly. Slice in half and serve while still warm.
 Save
Save There was one afternoon when I made these for a small picnic in my backyard with two friends. We sat on a blanket with nothing fancy, just these sandwiches and some iced tea, and it felt like the best meal we had shared in months. Sometimes the simplest food becomes the most memorable when you are with the right people.
Choosing Your Bread
I have tried this sandwich with all kinds of bread, and while white sandwich bread works in a pinch, a sturdy rustic or sourdough really makes it shine. The thicker slices hold up better to the moisture from the tomato and give you more surface area for that buttery, crispy crust. If you want to sneak in some extra nutrition, whole wheat or multigrain works beautifully without losing any of the comfort factor.
Tomato Tips
The tomato can make or break this sandwich, so choose one that is ripe, firm, and flavorful. I slice mine about a quarter inch thick and pat them dry with a paper towel to avoid a soggy sandwich. In the winter when fresh tomatoes are sad and flavorless, I sometimes skip them entirely or use a few sun-dried tomatoes instead, which add a sweet, concentrated punch.
Serving Suggestions
This sandwich is perfect on its own, but it becomes a full meal when you pair it with a bowl of tomato soup or a simple green salad. I have also served it cut into smaller squares as an appetizer at casual gatherings, and it always disappears fast. A drizzle of balsamic glaze right before serving adds a tangy sweetness that takes it to another level.
- Serve with a side of crispy potato chips or sweet potato fries for a nostalgic lunch.
- Add a handful of arugula inside the sandwich for a peppery bite and extra freshness.
- Try dipping it in marinara sauce or pesto for a fun twist on the classic.
 Save
Save This sandwich has become my go-to whenever I need something quick, comforting, and just a little bit special. I hope it brings you the same kind of simple joy it has brought me, one golden, melty bite at a time.
Recipe FAQs
- → Can I use a different type of cheese?
Absolutely. While fresh mozzarella is ideal for this sandwich, provolone and sharp cheddar are excellent alternatives that add different flavor profiles and melting characteristics.
- → What bread works best for this sandwich?
Rustic sourdough is recommended for its hearty texture and subtle tang, but whole wheat and multigrain breads are wonderful options that pair beautifully with the fresh basil and tomato.
- → How do I get a crispy exterior and melted cheese?
Use medium heat and cook for 3-4 minutes per side. Gently pressing with a spatula helps create an even, crisp crust while allowing the cheese to melt throughout the sandwich.
- → What should I serve alongside this sandwich?
Tomato soup is a classic pairing that complements the flavors perfectly. You could also serve it with a simple green salad or roasted vegetables.
- → Can I prepare this ahead of time?
It's best served immediately after cooking for optimal texture and temperature. However, you can assemble the sandwiches ahead and cook them fresh when ready to eat.
- → How do I prevent the bread from burning?
Medium heat is key—this allows the bread to toast golden brown and the cheese to melt without the exterior burning. Watch carefully and adjust heat if needed during cooking.